Here is a brief guide to using PuTTY to connect to our console shell, for both Dedicated Servers (*.dh.bytemark.co.uk) and Legacy Virtual Machines (*vm.bytemark.co.uk). This guided does not apply to RapidSwitch dedicated servers, or to Bytemark Cloud machines.
PuTTY is a simple SSH client available for Windows (but also works on Linux).
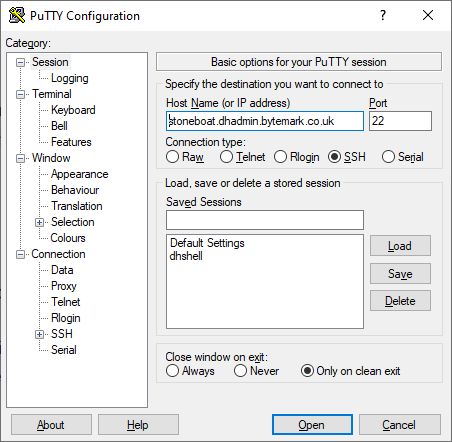
Determine the address of your console server. Each console server serves many machines, but it also has an address per machine. That address is nearly, but not quite, the same as the name of your machine.
A dedicated server’s name ends .dh.bytemark.co.uk, and its console server ends .dhadmin.bytemark.co.uk. For example a dedicated server called stoneboat can be reached through the console server found at stoneboat.dhadmin.bytemark.co.uk.
A legacy virtual server’s name ends .vm.bytemark.co.uk, and its console server ends .vmadmin.bytemark.co.uk. For example a dedicated server called stoneboat can be reached through the console server found at stoneboat.vmadmin.bytemark.co.uk.
Type in the name of the console machine. See above, and see the Console Shell page for more information.
Type in the username with which you would like to log in as.
- For customers with Dedicated Servers (eg stoneboat.dh.bytemark.co.uk), this is always
dhshell. - For Legacy Virtual Machine customers (eg stoneboat.vm.bytemark.co.uk), this is the same as your Legacy Virtual Machine name (
stoneboatin the example).

Select the PuTTy key. This is required.
If you’re a Dedicated Server customer; please contact support if we have not provided the PuTTY key.
For Legacy Virtual Machine customers, the password will be the same as the one in the welcome email, unless you have changed it of course.

Save the session (optional). This is a handy short cut to help you quickly log in. Type the session name you’d like in the Saved Sessions box, and click Save.
Click connect. It should have logged in. You may be prompted to accept the host key. If you would like to check it, we have a list of host keys available.