Mattermost is an online chat application which you can host on your own server, and administer your community from your web browser. It takes around 20 minutes to install.

We’ve based these instructions on the Docker instructions and simplified them. You don’t need to make as many decisions if you’re hosting at Bytemark, and we can also support you in getting it up and running.
If you’ve tried this before and got stuck, don’t worry! We’ll show you how to pull together Debian, Docker and self-hosted email so that you can get your team running on Mattermost in about 20 minutes.
Create the server
Head over to Bytemark’s create server panel to get that going. We recommend these server specs to start with. You can expand them later on if you need to support more users or messages being posted:
- Name: mattermost
- Group: (you can leave this on the default)
- Resources: 1 Core, 2 GiB Memory
- OS: Debian 9
- Discs:
- Root disc, 25GB
- Backup Schedule: The default is fine, and free!
- Boot Options: Select the ‘Add script‘ option, and copy and paste the following script (see the ‘Installing the software‘ section, below) into the text box.
- Authentication: You can leave this setting alone and a password will be generated for you, or you can select ‘SSH key (+ Password)‘ to enter your SSH key.
Click the ‘Add this server‘ button to begin installation.
Installing the software
If you’re using Bytemark to create your server, you can copy & paste this firstboot script. It will install Mattermost and set it up in one shot.
Alternatively if you’re not hosting at Bytemark, you can SSH into the server once you’ve got access to it, and run this script by hand:
#!/bin/bash
#
# Enter your email address here
export EMAIL=my.email.address@example.com

# This sets up a Debian host
export DEBIAN_FRONTEND=noninteractive
export HOSTNAME=`hostname -f`

# wait for dpkg to come available
while ! apt-get -qq check; do sleep 1; done

# Tools to install Docker and configure XFS
apt-get install -yq apt-transport-https ca-certificates curl software-properties-common xfsprogs apg apache2-utils

# Add Docker security keys
curl -fsSL https://download.docker.com/linux/$(. /etc/os-release; echo "$ID")/gpg | apt-key add -

# Add Docker repository
add-apt-repository \
"deb [arch=amd64] https://download.docker.com/linux/$(. /etc/os-release; echo "$ID") \
$(lsb_release -cs) \
stable"

# Finally install Docker and git
apt-get update
apt-get install -yq docker-ce git

# Not sure why this is necessary for Docker
sleep 5
apt-get -f install
apt-get -f install

# install only depenencies for docker-compose...
apt-get install -yq $(apt-cache depends docker-compose | grep Depends | sed "s/.*ends:\ //" | tr '\n' ' ' | sed -e "s/.*ends:\ //" -e 's/<[^>]*>//g')

# ...then install latest from github
curl -L https://github.com/docker/compose/releases/download/1.19.0/docker-compose-`uname -s`-`uname -m` -o /usr/local/bin/docker-compose
chmod +x /usr/local/bin/docker-compose

# Download Mattermost compose templates
cd /root
git clone https://github.com/mattermost/mattermost-docker.git

# but let's make some alterations
cd mattermost-docker

# set config directory to correct permissions
mkdir -p config
chown 2000:2000 config

# 1. create our config automatically
export DBPASSWORD=`apg -m 25 -n 1`
export TRAEFIK_CONSOLE_PASSWORD=`apg -m 16 -n 1`

echo $TRAEFIK_CONSOLE_PASSWORD >traefik-password

cat >.env <<END MATTERMOST_DOMAINS=$HOSTNAME TRAEFIK_DOMAINS=$HOSTNAME BASIC_AUTH=`htpasswd -b -n admin $TRAEFIK_CONSOLE_PASSWORD` POSTGRES_USER=mmuser POSTGRES_PASSWORD=$DBPASSWORD POSTGRES_DB=mattermost MM_USERNAME=mmuser MM_PASSWORD=$DBPASSWORD MM_DBNAME=mattermost ACME_EMAIL=$EMAIL END # 2. use a v3 docker compose file and traefik cat >docker-compose.yml <<END version: "3" networks: frontend: backend: volumes: mattermost-db: mattermost-data: mattermost-logs: services: mail: labels: - "traefik.enable=false" image: bytemark/smtp restart: always networks: - frontend db: build: db read_only: true restart: always networks: - backend volumes: - mattermost-db:/var/lib/postgresql/data - /etc/localtime:/etc/localtime:ro environment: - POSTGRES_USER - POSTGRES_PASSWORD - POSTGRES_DB app: depends_on: - db - mail build: context: app args: - edition=team restart: always networks: - frontend - backend volumes: - mattermost-data:/mattermost/data:rw - mattermost-logs:/mattermost/logs:rw - ./config:/mattermost/config:rw - /etc/localtime:/etc/localtime:ro environment: - MM_USERNAME - MM_PASSWORD - MM_DBNAME labels: - "traefik.docker.network=frontend" - "traefik.enable=true" - "traefik.frontend.rule=Host:\${MATTERMOST_DOMAINS}" - "traefik.port=8000" - "traefik.protocol=http" traefik: depends_on: - app image: traefik:1.7 command: --api --docker --acme.email="\${ACME_EMAIL}" restart: always networks: - backend - frontend volumes: - /var/run/docker.sock:/var/run/docker.sock # Access to Docker - ./traefik.toml:/traefik.toml # Traefik configuration - ./acme.json:/acme.json # SSL certificates ports: - "80:80" - "443:443" labels: - "traefik.docker.network=frontend" - "traefik.enable=true" - "traefik.frontend.rule=Host:\${TRAEFIK_DOMAINS}; PathPrefixStrip:/traefik" - "traefik.port=8080" - "traefik.protocol=http" # Remove next line to disable login prompt for the dashboard. - "traefik.frontend.auth.basic=\${BASIC_AUTH}" END # 3. supply traefik config file cat >traefik.toml <<END
# Traefik will listen for traffic on both HTTP and HTTPS.
defaultEntryPoints = ["http", "https"]
# Network traffic will be entering our Docker network on the usual web ports
# (ie, 80 and 443), where Traefik will be listening.
[entryPoints]
  [entryPoints.http]
  address = ":80"
  # Comment out the following two lines to redirect HTTP to HTTPS.
  #   [entryPoints.http.redirect]
  #   entryPoint = "https"
  [entryPoints.https]
  address = ":443"
    [entryPoints.https.tls]

# These options are for Traefik's integration with Docker.
[docker]
endpoint = "unix:///var/run/docker.sock"
domain = "docker.localhost"
watch = true
exposedByDefault = false

# These options are for Traefik's integration with Let's Encrypt.
# Your certificates are stored inside /acme.json inside the container,
# which is /root/compose/acme.json on your server.
[acme]
storage = "acme.json"
onHostRule = true
entryPoint = "https"
  [acme.httpChallenge]
  entryPoint = "http"
# https://docs.traefik.io/configuration/logs/
# Comment out the next line to enable Traefik's access logs.
# [accessLog]

END

# 4 - start it up
cd /root/mattermost-docker
docker-compose up -d
Wait for it to install
Mattermost will now install. While you’re waiting note down the server password! You can keep it, or change it later (see below) but if you lose it you’ll need to contact support.
Mattermost will take about 15 minutes to set up. You can watch its progress by opening the Console, and when you see the login: prompt, it’s ready
Now just type the hostname into your web browser, e.g. in our case
http://mattermost.default.matthew.uk0.bigv.io/
And that’s it! You should see the Mattermost welcome screen.
Set up your first user
The first user you create will be the administrator, so tell Mattermost your email address, username and password:
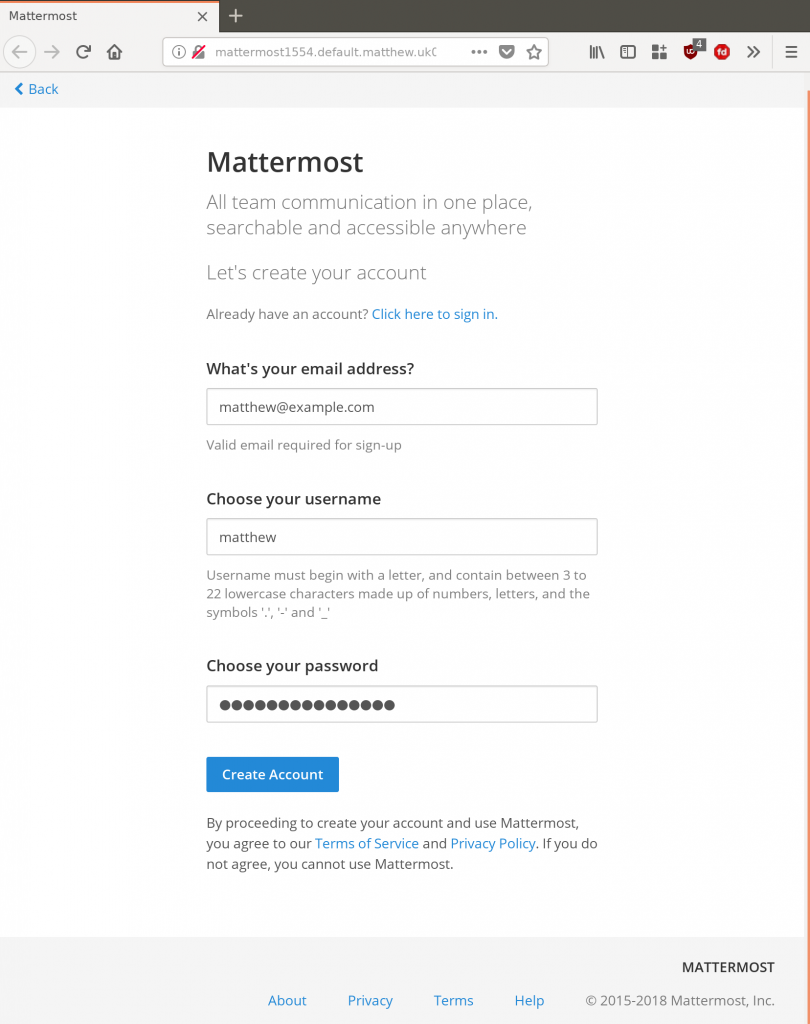
When you click the ‘Create Account‘ button, it will take you through to the team screen:
![]()
You can see that ugly blue banner at the top – let’s go and setup the site a little bit before we dive in and starting using it.
So click ‘Go to System Console‘ link.
Essential site setup
Mattermost’s settings are divided into lots of categories, which you can see down the left-hand-side:
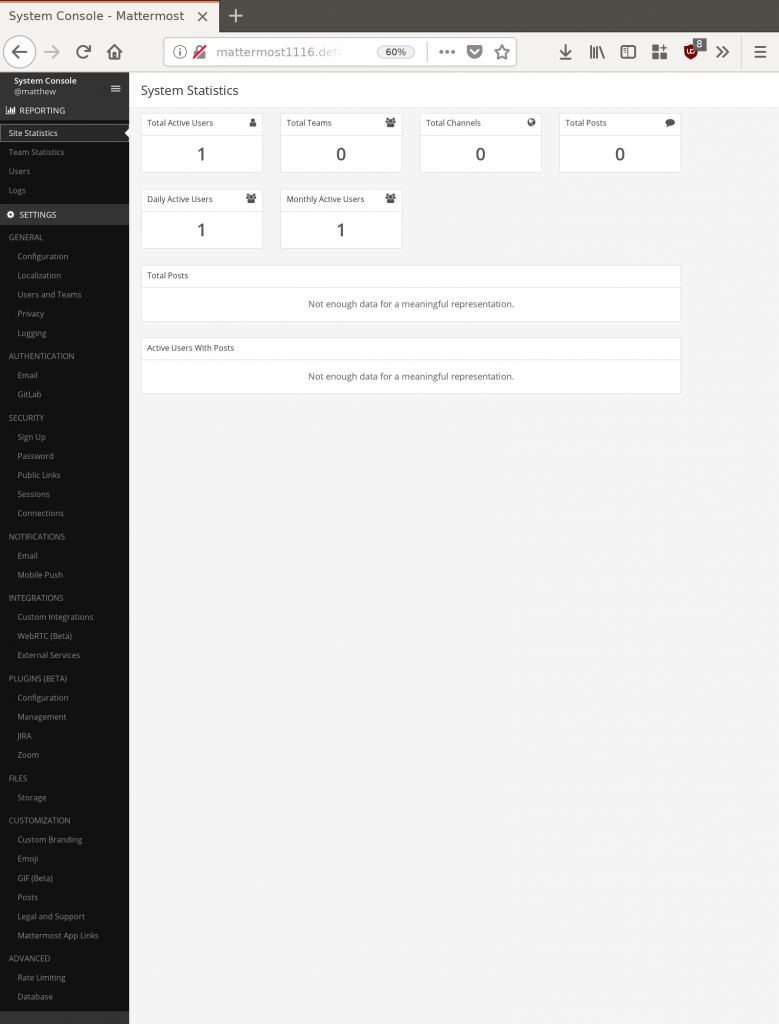
But you only need to look at a few of them to get started; we’d advise setting things up in this order:
General > Configuration > Site URL
- Set this to the URL you want to use. In our case,
https://mattermost.default.matthew.uk0.bigv.io/(don’t forget the ‘http://‘ or ‘https://‘ or you will get an error) - Don’t touch the SSL settings, since this is handled outside of Mattermost.
- Click the ‘Save‘ button at the bottom of the window.
Notifications > Email
- Set ‘Enable Preview Mode Banner‘ (the 2nd option) to false
- Set ‘Enable Email Notifications‘ (the 1st option) to true (if you set those options in the opposite order, one will grey itself out for no reason!)
- Set ‘Notification Display Name‘ to e.g. Mattermost
- Set ‘Notification From Address‘ to e.g.
mattermost@mattermost.default.matthew.uk0.bigv.io(or whatever the name of your server is) - Set ‘SMTP Server‘ to mail
- Set ‘SMTP Server Port‘ to 25
- Click the ‘Test Connection‘ button (you may need to scroll down the page a little to find the button). Assuming you get a ‘No errors were reported…‘ message and you receive an email, you’re good!
- Click the ‘Save‘ button at the bottom of the window.
Security > Sign Up
Right now nobody else can create an account on your server. Here’s where you can define who’s allowed on.
- If you want a server where anyone can register, change ‘Enable Open Server‘ to true.
- Alternatively, if you just want to invite new people, you need to set ‘Enable Email Invitations‘ to true.
- We’d recommend changing ‘Require Email Verification‘ to true as well.
- Click the ‘Save‘ button at the bottom of the window.
Other settings to check
The sections General > Users and Teams and General > Privacy have some important settings around how your team members register and are visible from the outside.
But if you’ve just followed the guide so far, the site will let people register themselves for an account from the front page.