You can reset the root password for a Cloud Server by booting into the ‘rescue’ environment. This will require a short period of downtime.
Restarting Your Cloud Server in the Rescue Environment
When you are ready to reboot your server;
- Log in to the Bytemark Panel.
- Select ‘Servers‘ from the menu.
- Select the server you want to reset the password for. This will expand the server, displaying additional actions & information.
- Click the ‘Restart‘ button.
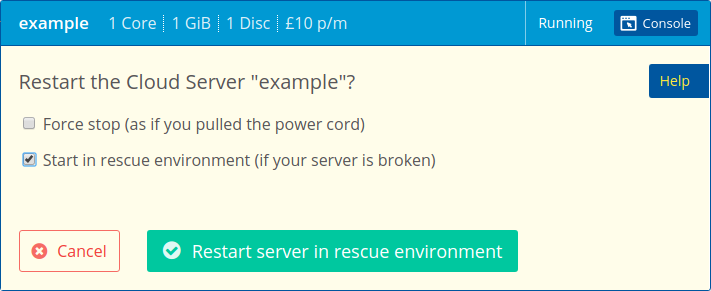
- Tick the ‘Start in rescue environment (if your server is broken)‘ box.
- Click the ‘Restart server in rescue environment‘ button and your server will reboot.
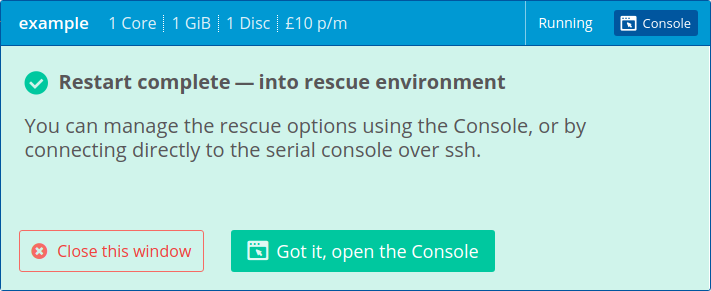
- When the ‘Starting server into rescue environment … please wait‘ message disappears, click the ‘Got it, open the console‘ button to open the console window.
Now you have started your server in the rescue environment, please follow the relevant section below for the operating system your server is running.
Process for servers running Linux
Mounting your drive
At the / # prompt, run the following commands to mount your drive:
mkdir /target/
mount /dev/vda2 /target/
Accessing your file system
To run programs on your real file system you will need to run the command:
chroot /target/
This gives you a prompt ‘inside’ your normal system.
Changing Your Root Password
You can now reset your password by running:
passwd rootYou will be prompted to enter the new root password you want to use. It is normal for nothing to be displayed on the screen as you type your password. You will be asked to enter your password for a second time to confirm you typed it correctly. You should receive the message ‘passwd: password updated successfully‘ when this is complete.
Now run the following commands to unmount your drive and reboot your server:
exit
umount /target/
reboot
Process for servers running Windows
- Restart your server in the rescue environment.
- Add support for the NTFS file system by running the following command:
apk add ntfs-3g
- Create a directory called ‘target‘, mount your drive there and navigate to the ‘System32‘ directory.
mkdir target
mount -t ntfs-3g /dev/vda2 /target
cd /target/Windows/System32
Note: If the mount command fails, try running it with
-o forceon the end - Temporarily replace the ‘Magnify.exe‘ executable so it opens a command prompt instead:
mv Magnify.exe Magnify.bak
cp cmd.exe Magnify.exe
- Unmount your filesystem and reboot the server by running the following commands:
cd /
umount target
exit
reboot
- When the Windows login screen appears, click the ‘Ease of access‘ icon (bottom left) and click ‘Magnifier‘ which should now open a command prompt.
- Reset your password by running the following command, replacing
passwordwith the new password you want to use:net user administrator password
- Login to check the new password works.
- Once you have confirmed you can login successfully, restart your server in rescue mode again, and reverse step 4 by renaming the ‘Magnify.exe‘ executable by running:
mv Magnify.bak Magnify.exe
- You’re done! Reboot your server.