In just a few minutes you’ll have a WordPress website running with all of these open-source goodies:
- Docker, a powerful and standardized way to deploy applications
- Free SSL certificates from Let’s Encrypt (via Traefik)
- phpMyAdmin to easily manage your databases
- Automatic container updates (via Watchtower)
If you’ve got your own server already — whether at Bytemark or not — skip the Create a Cloud Server section and run our setup script on your server instead.
If you’re looking for recommended deployment practices and what’s happening under the hood, skip down to Look a bit deeper.
Create a Cloud Server
- Login to the Bytemark Panel (or start a free trial).
- Add a Cloud Server with these settings:
- Name: Give your server a name (eg, “wordpress”)
- Group: Leave as “default”
- Resources: 1 Core, 1GiB Memory
- Operating System: Debian 9
- Discs: 25GiB SSD storage
- Backup Schedule: Leave enabled (recommended)
- Boot options: Select Add script and paste this inside:
Setup Script
#!/bin/sh
export DEBIAN_FRONTEND=noninteractive

# Wait for apt-get to be available.
while ! apt-get -qq check; do sleep 1s; done

# Install docker-ce and docker-compose.
apt-get update
apt-get install -y apt-transport-https ca-certificates curl gnupg2 software-properties-common
curl -fsSL https://download.docker.com/linux/debian/gpg | apt-key add -
add-apt-repository "deb [arch=amd64] https://download.docker.com/linux/debian `lsb_release -cs` stable"
apt-get update
apt-get install -y docker-ce
curl -fsSL https://github.com/docker/compose/releases/download/1.21.2/docker-compose-`uname -s`-`uname -m` -o /usr/local/bin/docker-compose
chmod +x /usr/local/bin/docker-compose

# Check for security updates every night and install them.
apt-get install -y unattended-upgrades

# Retrieve configuration files. Lots of explanatory comments inside!
# If you'd rather inspect and install these files yourself, see:
# https://docs.bytemark.co.uk/article/wordpress-on-docker-with-phpmyadmin-ssl-via-traefik-and-automatic-updates/#look-a-bit-deeper
mkdir -p /root/compose
curl -fsSL https://raw.githubusercontent.com/BytemarkHosting/configs-wordpress-docker/master/docker-compose.yml -o /root/compose/docker-compose.yml
curl -fsSL https://raw.githubusercontent.com/BytemarkHosting/configs-wordpress-docker/master/.env -o /root/compose/.env
curl -fsSL https://raw.githubusercontent.com/BytemarkHosting/configs-wordpress-docker/master/traefik.toml -o /root/compose/traefik.toml
curl -fsSL https://raw.githubusercontent.com/BytemarkHosting/configs-wordpress-docker/master/php.ini -o /root/compose/php.ini

# Traefik needs a file to store SSL/TLS keys and certificates.
touch /root/compose/acme.json
chmod 0600 /root/compose/acme.json

# Use the hostname of the server as the main domain.
sed -i -e "s|^TRAEFIK_DOMAINS=.*|TRAEFIK_DOMAINS=`hostname -f`|" /root/compose/.env
sed -i -e "s|^WORDPRESS_DOMAINS=.*|WORDPRESS_DOMAINS=`hostname -f`|" /root/compose/.env

# Fill /root/compose/.env with some randomly generated passwords.
sed -i -e "s|^WORDPRESS_DB_ROOT_PASSWORD=.*|WORDPRESS_DB_ROOT_PASSWORD=`cat /dev/urandom | tr -dc '[:alnum:]' | head -c14`|" /root/compose/.env
sed -i -e "s|^WORDPRESS_DB_PASSWORD=.*|WORDPRESS_DB_PASSWORD=`cat /dev/urandom | tr -dc '[:alnum:]' | head -c14`|" /root/compose/.env
apt-get install -y apache2-utils
BASIC_AUTH_PASSWORD="`cat /dev/urandom | tr -dc '[:alnum:]' | head -c10`"
BASIC_AUTH="`printf '%s\n' "$BASIC_AUTH_PASSWORD" | tee /root/compose/auth-password.txt | htpasswd -in admin`"
sed -i -e "s|^BASIC_AUTH=.*|BASIC_AUTH=$BASIC_AUTH|" /root/compose/.env

# Start our containers.
cd /root/compose
docker-compose up -d
- Have a cup of tea! Your WordPress site will be ready in about 5 minutes.
- The Panel will tell you the root password for your server. Save it!
- Click on the Console button next to your Cloud Server. You’ll know installation has finished when you see a login prompt. You can login with username root.
After installation
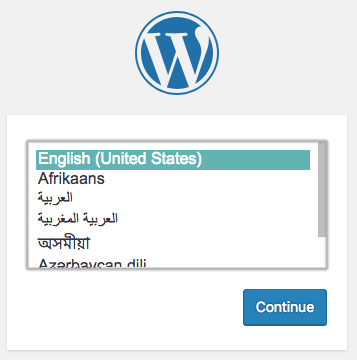
Now you can browse to your new WordPress website at the hostname of your server (eg, http://name.of.server.uk0.bigv.io) and start writing content! If you want to use your own domain, it’s easier to configure that first before going through the WordPress setup wizard.

If you see a Bad Gateway message, wait a few seconds for the database to initialize and then refresh your page.
Read on if you want to Allow WordPress to send email, Use your own domain, Enable SSL/TLS or Access phpMyAdmin.
Allow WordPress to send email
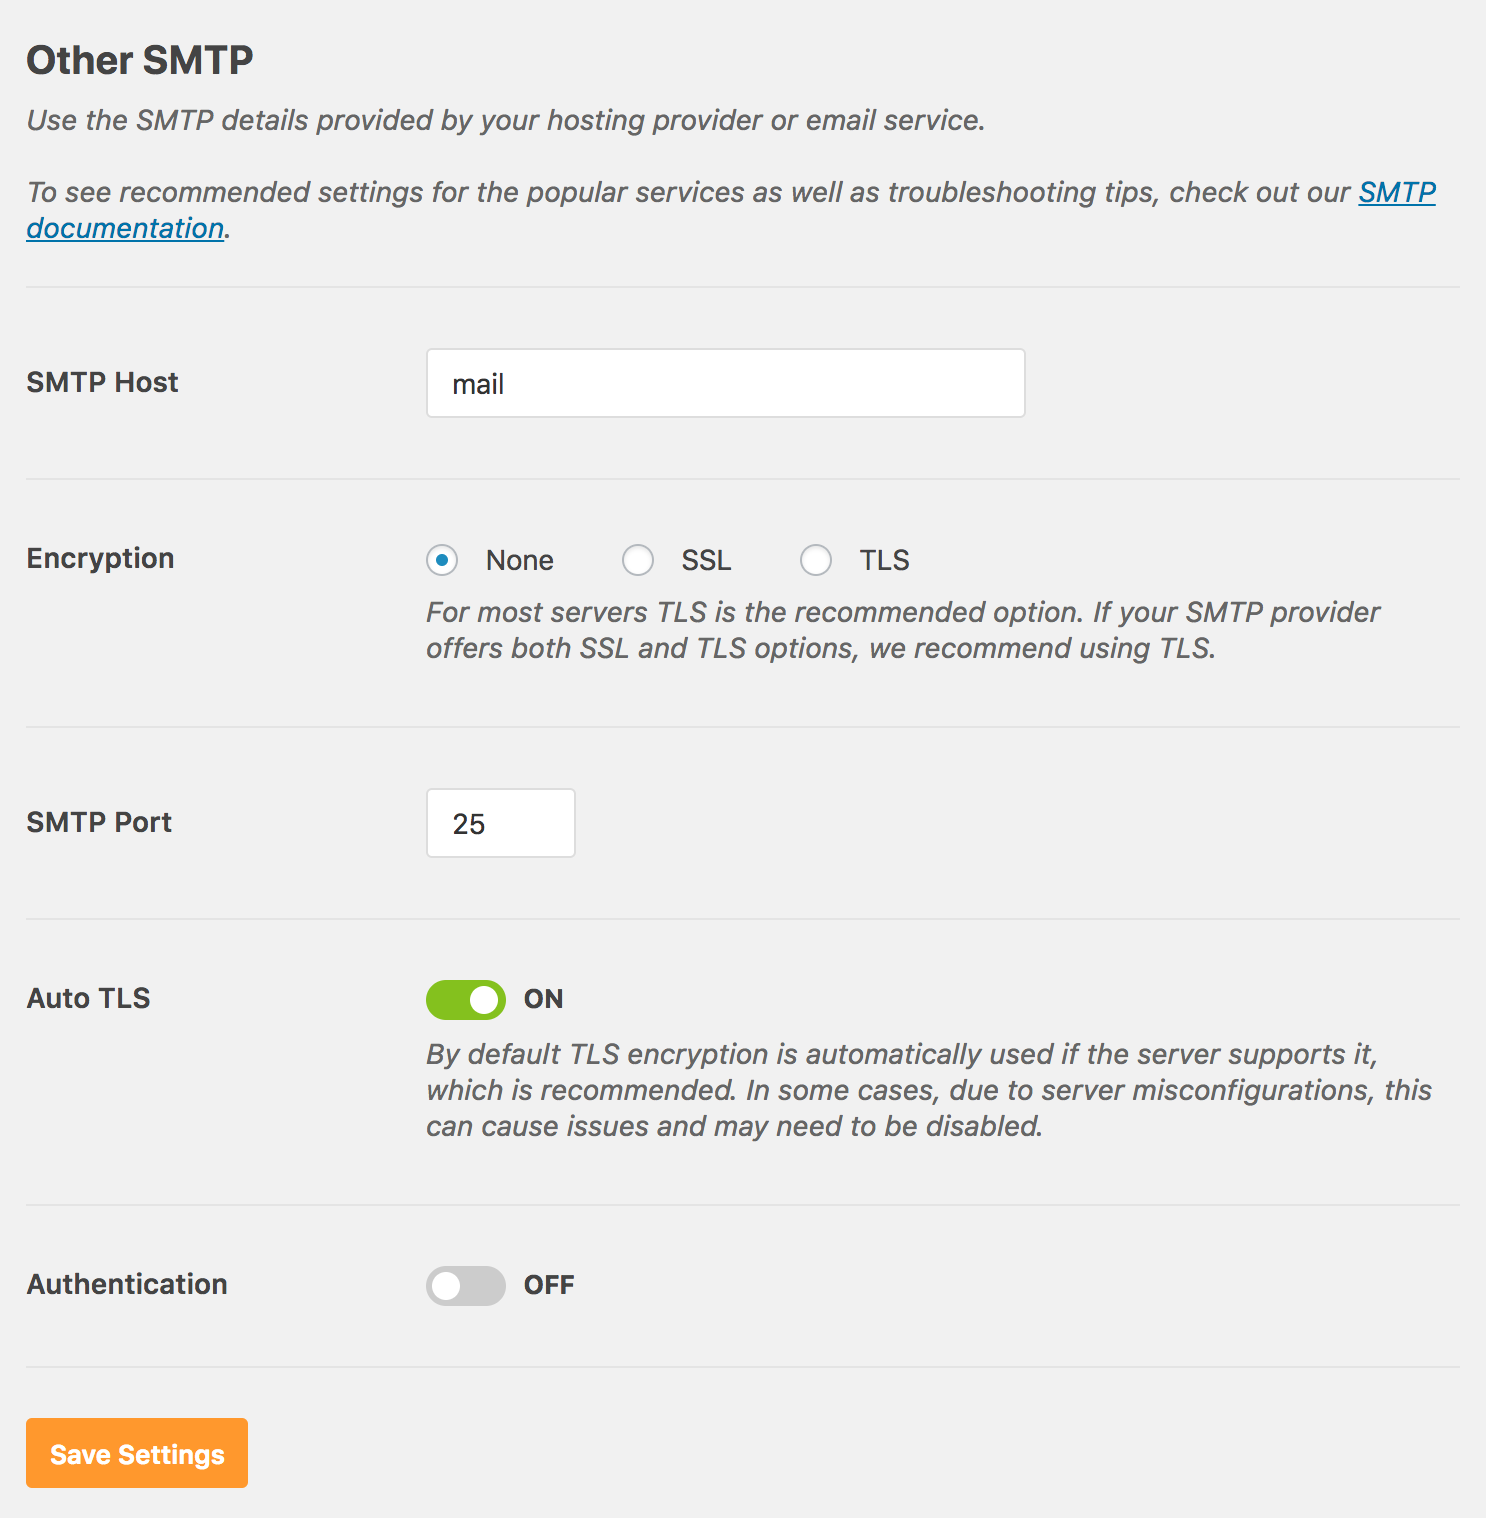
We’re running a container to handle outgoing email. WordPress has access to this via SMTP at the hostname mail and port 25. Follow these steps to enable it:
- Login to your WordPress admin dashboard.
- Go to Plugins, click Add New, search for WP Mail SMTP by WPForms and click Install Now.
- Once it’s finished installing, click Activate to enable the plugin.
- Click Settings to configure the plugin.
- Fill in the From Email (eg,
no-reply@example.com) and the From Name (eg,Jane Doe). - In the Mailer section, select Other SMTP.
- Set the SMTP Host to mail and the SMTP Port to 25.
- Click Save Settings.

Use your own domain
If you’ve already gone through the WordPress setup wizard, before you take the next steps: login to your WordPress dashboard, go to Settings and change the WordPress Address and Site Address to the new domain. After you click `Save`, you’ll get a 404 message but that’s expected until you do the next steps.
Login to your Cloud Server and open /root/compose/.env in a text editor:
nano /root/compose/.env
Change WORDPRESS_DOMAINS to your own domain. For example:
WORDPRESS_DOMAINS=my-brilliant-site.com,www.my-brilliant-site.com
Do the same for TRAEFIK_DOMAINS if you want to access the Traefik dashboard.
Restart your Docker containers to apply the change:
cd /root/compose
docker-compose down
docker-compose up -d
Enable SSL/TLS
Configure your own domain as per the previous step. All domains you list in WORDPRESS_DOMAINS must point to your server (via DNS records) for this to work.
Once you’ve done that, Traefik will generate Let’s Encrypt SSL certificates for you automatically! Browse to https://your_domain.com to see if it worked.
If you want to redirect all HTTP traffic to HTTPS (as is recommended these days), open /root/compose/traefik.toml in a text editor and uncomment two lines so that it looks like this:
[entryPoints]
  [entryPoints.http]
  address = ":80"
  # Uncomment the following two lines to redirect HTTP to HTTPS.
    [entryPoints.http.redirect]
    entryPoint = "https"
Open /root/compose/docker-compose.yml in a text editor. Under the wp: section, uncomment the bottom line so that it looks like this:
      # Uncomment the next line to enable HSTS header.
      - "traefik.frontend.headers.STSSeconds=15768000"
Restart your Docker containers to apply the change:
cd /root/compose
docker-compose down
docker-compose up -d
Access phpMyAdmin
The setup script generated a password and saved it inside /root/auth-password.txt on your server. Look inside to see what the browser authentication password is for the admin user:
cat /root/compose/auth-password.txt
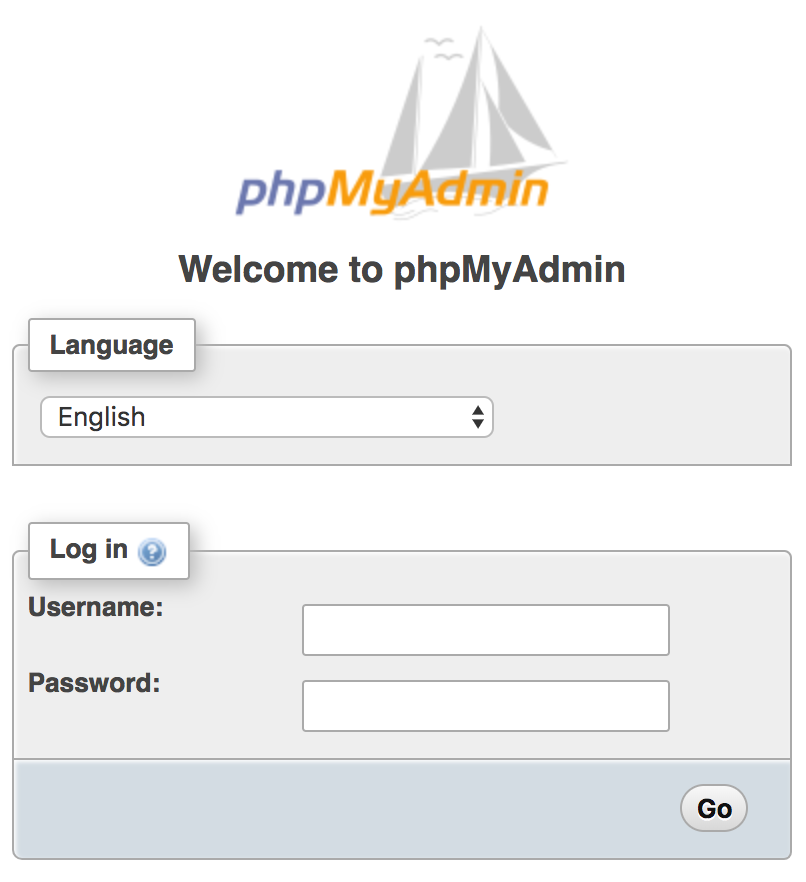
Go to http://name.of.server.uk0.bigv.io/phpmyadmin/ in your browser. The last forward slash is important! Login with username admin.
If that works, you’ll see this:

Here you can login as any MySQL user you want. You can find the password for the MySQL root user inside your Docker environment file (which also has instructions on how to change any of the passwords used):
cat /root/compose/.env
Access the Traefik dashboard
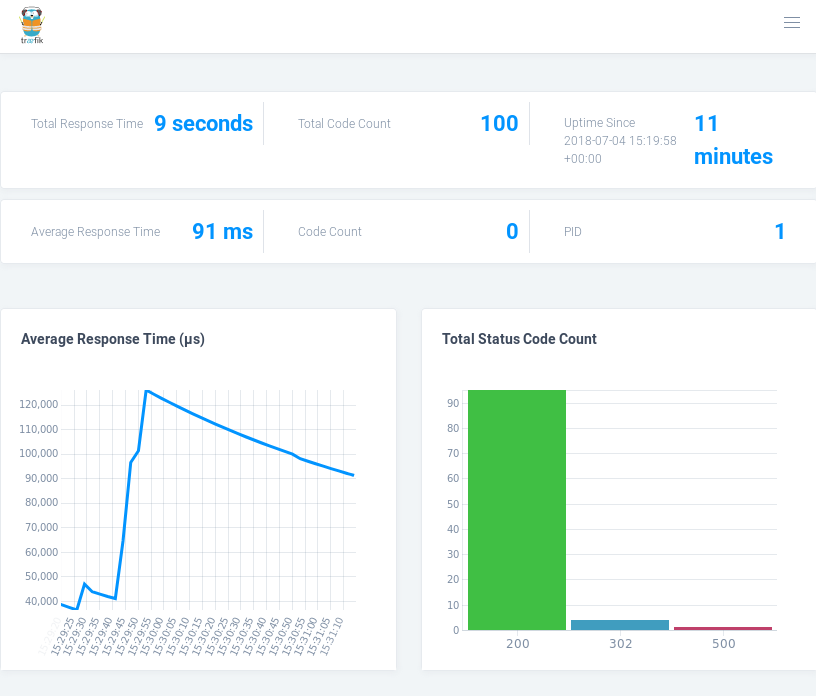
Traefik has a nice dashboard with health metrics. Navigate to http://name.of.server.uk0.bigv.io/traefik/ and login with username admin and the same browser authentication password as for phpMyAdmin above.

Look a bit deeper
This is what we consider an ideal way to deploy WordPress.
Our setup script did all of these steps for you, but if you’re looking to walk through each step yourself then read on!
Install Docker
If you’re running Debian 9 (Stretch) or similar, run these commands:
apt-get update
apt-get install -y apt-transport-https ca-certificates curl gnupg2 software-properties-common
curl -fsSL https://download.docker.com/linux/debian/gpg | apt-key add -
add-apt-repository "deb [arch=amd64] https://download.docker.com/linux/debian `lsb_release -cs` stable"
apt-get update
apt-get install -y docker-ce
curl -fsSL https://github.com/docker/compose/releases/download/1.21.2/docker-compose-`uname -s`-`uname -m` -o /usr/local/bin/docker-compose
chmod +x /usr/local/bin/docker-compose
docker-compose.yml
Docker Compose helps you to manage Docker containers and easily link related containers together.
Create a directory called /root/compose and save the text below as /root/compose/docker-compose.yml on your server:
version: '3'
# See https://docs.docker.com/compose/overview/ for more information.

# If you make changes to this file or any related files, apply them by
# navigating to the directory that holds this file and run this as root:
#   docker-compose down; docker-compose up -d

# Create two networks: one for front-end containers that we'll make
# publicly accessible to the internet, and one for private back-end.
networks:
  frontend:
  backend:

# Create persistent Docker volumes to preserve important data.
# We don't want our data to be lost when restarting containers.
volumes:
  vol-wp-db:
  vol-wp-content:

# Create our containers.
services:
  # Traefik is a reverse proxy. It handles SSL and passes traffic to
  # Docker containers via rules you define in docker-compose labels.
  # Its dashboard is at http://example.com/traefik/ (behind a login).
  traefik:
    # https://hub.docker.com/_/traefik/
    image: traefik:latest
    command: --api --docker --acme.email="${ACME_EMAIL}"
    restart: always
    networks:
      - backend
      - frontend
    volumes:
      - /var/run/docker.sock:/var/run/docker.sock # Access to Docker
      - ./traefik.toml:/traefik.toml              # Traefik configuration
      - ./acme.json:/acme.json                    # SSL certificates
    ports:
      # Map port 80 and 443 on the host to this container.
      - "80:80"
      - "443:443"
    labels:
      - "traefik.docker.network=frontend"
      - "traefik.enable=true"
      - "traefik.frontend.rule=Host:${TRAEFIK_DOMAINS}; PathPrefixStrip:/traefik"
      - "traefik.port=8080"
      - "traefik.protocol=http"
      # Remove next line to disable login prompt for the dashboard.
      - "traefik.frontend.auth.basic=${BASIC_AUTH}"

  # Watchtower detects if any linked containers have an new image
  # available, automatically updating & restarting them if needed.
  watchtower:
    # https://hub.docker.com/r/centurylink/watchtower/
    image: v2tec/watchtower:latest
    # https://github.com/v2tec/watchtower#options
    # This schedule applies updates (if available) at midnight.
    command: --cleanup --schedule "0 0 0 * * *"
    restart: always
    volumes:
      - /var/run/docker.sock:/var/run/docker.sock
    labels:
      - "traefik.enable=false"

  wp-db:
    # https://hub.docker.com/_/mariadb/
    # Specify 10.3 as we only want watchtower to apply minor updates
    # (eg, 10.3.1) and not major updates (eg, 10.4).
    image: mariadb:10.3
    restart: always
    networks:
      - backend
    volumes:
      # Ensure the database persists between restarts.
      - vol-wp-db:/var/lib/mysql
    environment:
      MYSQL_ROOT_PASSWORD: ${WORDPRESS_DB_ROOT_PASSWORD}
      MYSQL_DATABASE: ${WORDPRESS_DB_NAME}
      MYSQL_USER: ${WORDPRESS_DB_USER}
      MYSQL_PASSWORD: ${WORDPRESS_DB_PASSWORD}
    labels:
      - "traefik.enable=false"

  # The main front-end application.
  wp:
    # https://hub.docker.com/_/wordpress/
    # Replace "latest" with "4.9" to stick to a specific version.
    image: wordpress:latest
    depends_on:
      - wp-db
    restart: always
    networks:
      - backend
      - frontend
    volumes:
      # Ensure WP themes/plugins/uploads persist between restarts.
      - vol-wp-content:/var/www/html/wp-content
      # Install our own php.ini, which can be customized.
      - ./php.ini:/usr/local/etc/php/php.ini
    environment:
      WORDPRESS_DB_HOST: wp-db:3306
      WORDPRESS_DB_NAME: ${WORDPRESS_DB_NAME}
      WORDPRESS_DB_USER: ${WORDPRESS_DB_USER}
      WORDPRESS_DB_PASSWORD: ${WORDPRESS_DB_PASSWORD}
    labels:
      - "traefik.docker.network=frontend"
      - "traefik.enable=true"
      - "traefik.frontend.rule=Host:${WORDPRESS_DOMAINS}"
      - "traefik.port=80"
      - "traefik.protocol=http"

  # Navigate to http://example.com/phpmyadmin/ to manage your MySQL
  # databases. (Don't forget the last forward slash.) Like the Traefik
  # dashboard, this is behind a login prompt to help you stay secure.
  wp-phpmyadmin:
    # https://hub.docker.com/r/phpmyadmin/phpmyadmin/
    image: phpmyadmin/phpmyadmin:latest
    depends_on:
      - wp-db
    restart: always
    networks:
      - backend
      - frontend
    volumes:
      # Install our own php.ini, which can be customized.
      - ./php.ini:/usr/local/etc/php/php.ini
    environment:
      PMA_HOST: wp-db
      PMA_ABSOLUTE_URI: /phpmyadmin/
      MYSQL_ROOT_PASSWORD: ${WORDPRESS_DB_ROOT_PASSWORD}
    labels:
      - "traefik.docker.network=frontend"
      - "traefik.enable=true"
      - "traefik.frontend.rule=Host:${WORDPRESS_DOMAINS}; PathPrefixStrip:/phpmyadmin/"
      - "traefik.port=80"
      - "traefik.protocol=http"
      # Remove the next line if you don't want a browser login prompt.
      - "traefik.frontend.auth.basic=${BASIC_AUTH}"

  # This allows WordPress to send email straight out of the box without
  # having to rely on an external provider like SendGrid or MailGun.
  # It makes an SMTP host available at the hostname "mail".
  mail:
    image: bytemark/smtp
    restart: always
    networks:
      - frontend
    labels:
      - "traefik.enable=false"
Docker .env file
Save the following text as /root/compose/.env on your server:
# Docker Compose can read environment variables from this file.
# See https://docs.docker.com/compose/env-file/

# Put admin areas behind a login prompt, with username and password
# specified here. Run `htpasswd -n admin` to create a password for
# user "admin" and paste the output here. SSL strongly recommended.
BASIC_AUTH=

# Let's Encrypt needs an email address for registration.
ACME_EMAIL=

# The Traefik dashboard will be available at these domains.
# The URL is http://example.com/traefik/
TRAEFIK_DOMAINS=example.com,www.example.com

# Your WP site will be available at these domains. If all domains
# have DNS records pointing to your server, they'll get SSL certs.
WORDPRESS_DOMAINS=example.com,www.example.com

# Set a secure password for the MySQL root user. Remember this so
# you can login to phpMyAdmin (as username "root").
WORDPRESS_DB_ROOT_PASSWORD=

# Set the MySQL database name, user and password for WordPress.
WORDPRESS_DB_NAME=wordpress
WORDPRESS_DB_USER=wordpress
WORDPRESS_DB_PASSWORD=
As a minimum, you need to fill the following settings:
BASIC AUTHTRAEFIK_DOMAINSWORDPRESS_DOMAINSWORDPRESS_DB_ROOT_PASSWORDWORDPRESS_DB_PASSWORD
Optionally, auto-fill those settings by running the commands below. It sets the domain to the hostname of your server, and it generates random passwords that you can review inside /root/compose/.env and /root/compose/auth-password.txt.
sed -i -e "s|^TRAEFIK_DOMAINS=.*|TRAEFIK_DOMAINS=`hostname -f`|" /root/compose/.env
sed -i -e "s|^WORDPRESS_DOMAINS=.*|WORDPRESS_DOMAINS=`hostname -f`|" /root/compose/.env
sed -i -e "s|^WORDPRESS_DB_ROOT_PASSWORD=.*|WORDPRESS_DB_ROOT_PASSWORD=`cat /dev/urandom | tr -dc '[:alnum:]' | head -c14`|" /root/compose/.env
sed -i -e "s|^WORDPRESS_DB_PASSWORD=.*|WORDPRESS_DB_PASSWORD=`cat /dev/urandom | tr -dc '[:alnum:]' | head -c14`|" /root/compose/.env
apt-get install -y apache2-utils
BASIC_AUTH_PASSWORD="`cat /dev/urandom | tr -dc '[:alnum:]' | head -c10`"
BASIC_AUTH="`printf '%s\n' "$BASIC_AUTH_PASSWORD" | tee /root/compose/auth-password.txt | htpasswd -in admin`"
sed -i -e "s|^BASIC_AUTH=.*|BASIC_AUTH=$BASIC_AUTH|" /root/compose/.env
Traefik
Making multiple containers accessible to the internet and sorting out SSL certificates can be a pain. That’s where Traefik comes in!
Traefik acts as a reverse proxy, listening on ports 80 and 443 and passing web traffic to the appropriate container based on rules you decide (eg, based on the URL). It also automatically retrieves Let’s Encrypt certificates for you.
Save the following text as /root/compose/traefik.toml on your server:
# Traefik will listen for traffic on both HTTP and HTTPS.
defaultEntryPoints = ["http", "https"]

# Network traffic will be entering our Docker network on the usual web ports
# (ie, 80 and 443), where Traefik will be listening.
[entryPoints]
  [entryPoints.http]
  address = ":80"
  # Comment out the following two lines to redirect HTTP to HTTPS.
  #  [entryPoints.http.redirect]
  #  entryPoint = "https"
  [entryPoints.https]
  address = ":443"
    [entryPoints.https.tls]

# These options are for Traefik's integration with Docker.
[docker]
endpoint = "unix:///var/run/docker.sock"
domain = "docker.localhost"
watch = true
exposedByDefault = false

# These options are for Traefik's integration with Let's Encrypt.
# Your certificates are stored inside /acme.json inside the container,
# which is /root/compose/acme.json on your server.
[acme]
storage = "acme.json"
onHostRule = true
entryPoint = "https"
  [acme.httpChallenge]
  entryPoint = "http"

# https://docs.traefik.io/configuration/logs/
# Comment out the next line to enable Traefik's access logs.
# [accessLog]
Traefik needs a file to store SSL keys and certificates, so run these commands:
touch /root/compose/acme.json
chmod 0600 /root/compose/acme.json
php.ini
Some of PHP’s default settings are a bit restrictive and a frequent cause of misery. Fortunately, you can use a custom php.ini file in the WordPress container.
Save the following text as /root/compose/php.ini on your server:
# Feel free to add and change any settings you want in here.
upload_max_filesize = 128M
post_max_size = 128M
max_execution_time = 180
memory_limit = 256M
SMTP
WordPress needs a way to send outgoing email. There are lots of SMTP images on Docker Hub that you can choose from.
We maintain a single-purpose bytemark/smtp image, which simply lets linked containers send email. (Optionally, you can configure it to act as a smart host that relays mail to an intermediate server such as SendGrid.)
Our Docker Compose file configures SMTP to be available to other containers at hostname mail and port 25.
Watchtower
Watchtower keeps all of your Docker containers up-to-date. Whenever the images you’re using are updated (eg, MariaDB, WordPress), watchtower automatically updates the relevant containers.
Our Docker Compose file configures watchtower to auto-update every night.
Manage your containers
To start your containers:
cd /root/compose
docker-compose up -d
To stop your containers:
cd /root/compose
docker-compose down