Before we begin:
- Please ensure you have backups of any data on the disc you are going to remove. Once a disc has been removed, your data cannot be restored.
- Please note: Only additional discs can be removed. You can’t remove your root disc (labelled ‘root: disc-1’)
Removing a disc (Linux method)
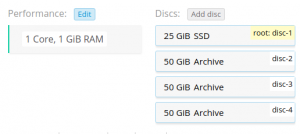
Let’s look at an example where your server has 3 archive discs which appear in the panel as follows:

and they are configured in the /etc/fstab file on your server as follows:
root@disk:~# cat /etc/fstab
UUID=37ddb290-13dc-41a1-be8e-19dfbea1ffc6     /     ext4     errors=remount-ro,noatime,nodiratime   0     1
UUID=69784f4b-2520-4366-817e-67db97a2223d     /boot ext3   errors=remount-ro   0     1
# /etc/fstab: static file system information.
#
# Use 'blkid' to print the universally unique identifier for a
# device; this may be used with UUID= as a more robust way to name devices
# that works even if disks are added and removed. See fstab(5).
#
#
# / was on /dev/vda1 during installation
# swap was on /dev/vda5 during installation

/dev/vdb 	/backup		ext4	defaults	0	0
/dev/vdc	/extra		ext4	defaults	0	0
/dev/vdd	/files		ext4	defaults	0	0
Linux automatically allocates drive letters on boot, with the first disc being labelled /dev/vda, and subsequent discs labelled /dev/vdb, /dev/vdc etc. The drive letter can be followed by a number representing a particular partition on the disc.
In our example /etc/fstab file above, the discs are being referenced (referred to) by their name. When we remove a disc, any discs with subsequent drive letters will change, so we need to update these entries, to reduce their drive letter by one. If we didn’t do this, the server may fail to boot, or it may mount the drives in the wrong place!
Please note: If your drives are being referenced by label or UUID then you don’t need to update your
/etc/fstabfile
Let’s say, you want to remove the disc /dev/vdb, named ‘disc-2’ in the Panel. To do this you would:
- Remove each entry in the
/etc/fstabfile that begins with/dev/vdb(or comment them out by adding a#to the start of each line). - Change any entries starting with
/dev/vdcto/dev/vdb, and/dev/vddto/dev/vdc.
If we were removing
/dev/vdc, we would only need to rename the entries starting with/dev/vdd(as we only need to update drives with subsequent drive letters). - Shut down the Cloud Server.
- Select ‘disc-2’ in the Panel and click the ‘purge disc‘ link (bottom-right), and (if you are sure!), confirm the action.
- Start the Cloud Server again. It should now boot without the drive we have just removed, and any remaining drives should be recognised and mounted correctly.
If your server fails to start, you can use the netboot environment to fix any issues.
Removing a disc (Windows method)
- Before removing a disc, shut down your Cloud Server.
- Select the disc you want to remove in the Panel and click the ‘purge disc‘ link (bottom-right), and (as long as you are sure!), confirm the action.
- Start your server. Windows should automatically detect that the drive has been removed, so no further action should be necessary.