You are able to swap the primary IP of your Cloud Server from within the Bytemark panel. There are two main steps to ensure that the IPs are swapped between servers, the first of which is within the Bytemark panel, followed by a few changes within each servers networking configuration.
There are some important points that you will need to consider before proceeding:
- Both servers must be shut down.
- Both servers must be within the same zone (ie. Both located in York).
- Additional IPs remain on the original server & aren’t swapped.
- Primary IPs include both the IPv4 & IPv6 addresses.
Actions to carry out:
- Login into the Bytemark Panel here: https://panel.bytemark.co.uk.
- Shutdown both servers that you wish to swap IPs between.
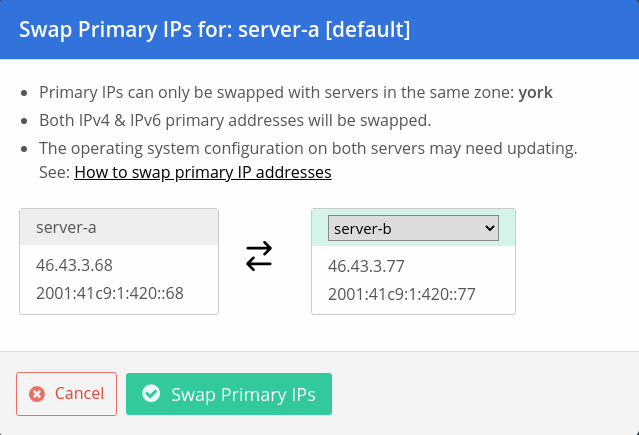
- Select the “Networking” tab on the Bytemark panel & on the original/old server select the “Swap primary IPs” button.
- Select the server you wish to swap the primary IP with (example below).
Once the above steps are complete. You will need to make some changes to a configuration file held on each server. On linux based operating systems the file is located at /etc/network/interfaces.
The two files, in essence, will need swapping over as the information within related to the old IP addresses. But to save copy & pasting, you just need to swap the IPv4 & IPv6 address sections, swapping the addresses so that they correspond with the correct server. This can either be achieved before you commit to the Panel steps or after using the “console” button on each server. Please pay particular attention to the subnet mask and default gateways on each when making changes to ensure that the servers will be available following a restart.
Updating the IP addresses on Windows Servers
Updating the IP addresses on windows servers requires the following steps:
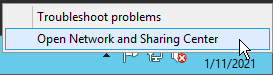
- Find the network icon in the system tray area:
- Right click on the icon and click “Open Network and Sharing Center”:
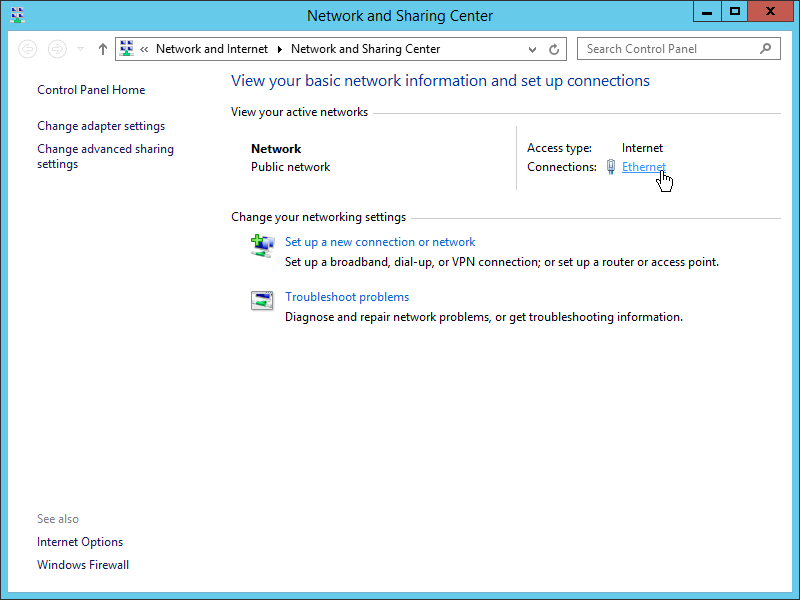
- In the “Network and Sharing Center” click on the Ethernet Status link:
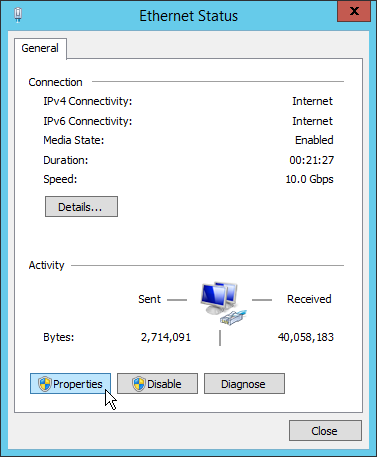
- In the Ethernet Status page click on the “Properties” button:
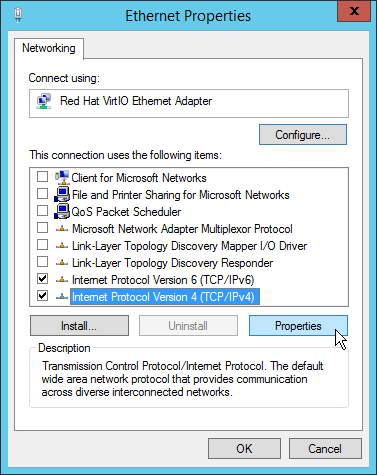
- In the Ethernet Properties page select “Internet Protocol Version 4 (TCP/IPv4) and click on the “Properties” button:
- Update the IP configuration of the server with the respective values for the new IP address and click “OK”
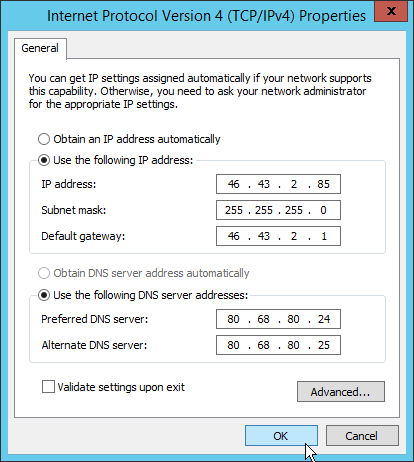
The server should now apply the configuration you have specified and should be reachable on the swapped IP address.
Updating the IPv6 address is the same process with only difference being selecting “IP Protocol Version 6 (TCP/IPv6)” from the list on the “Ethernet Properties” page.